Ever have those moments in Salesforce where you find yourself doing something you did 5 minutes ago? Open new record, click, type, save, repeat… yawn. If only there was a way to automate it! Sure, those administrators could take care of this for you, but you hate to interrupt them when you know they’re busy building their kingdom in Minecraft. Besides, you’re a Salesforce super user. You’ve got this! You can solve this problem when you create a macro in Salesforce.
Hello Macro: Automating Manual Processes
It is time to kick it up a notch and automate those repetitive tasks. If a task is one you do on-screen, a macro may be a good fit for you. While you can’t automate actions in list views (yet) you can automate most record details.
WARNING: The content you are about to read may leave you excited and passionate. Please use caution when expressing your enthusiasm.
Today we will use the classic example of working a Lead to introduce you to macros. Head over to your Salesforce instance, navigate to a Lead record, and get ready to begin!
In this example we are trying to automate the process of:
1. Logging a call was made into a Lead
2. Scheduling a follow-up task to call the Lead back in 3 days
3. Sending an email to the Lead letting them know we tried to reach them
Creating Your First Macro
The Utility Items (i.e. the bottom navigation bar) in Salesforce is where you will find your “Macros” link. Click on it, then press the “+” icon to fire up a new macro.
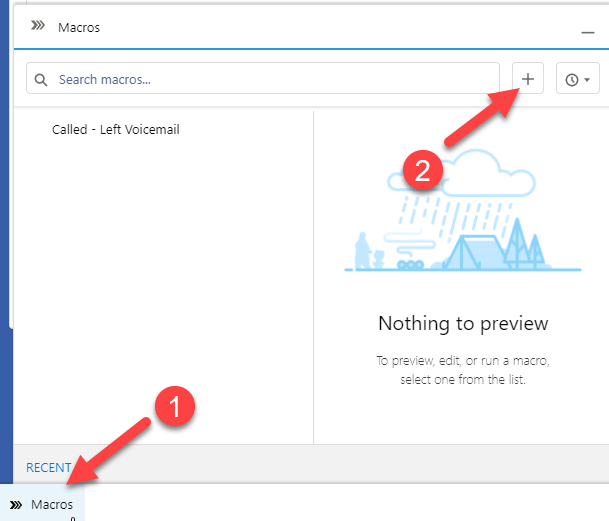
If you don’t see a “Macros” link it is because the Admin didn’t add it to your app. Unfortunately, you’ll have to submit a request to have it added and start making macros later.
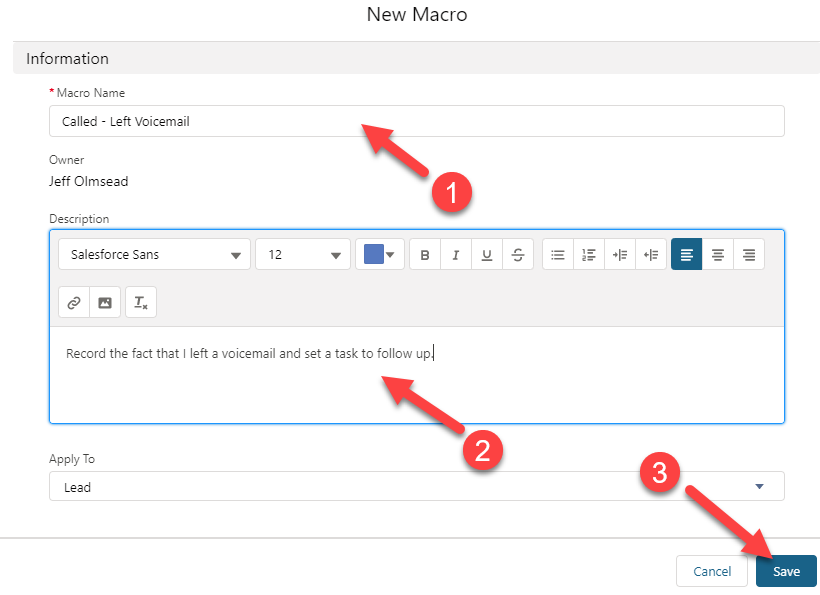
If you were able to find your “Macros” link, sweet! We’re getting there. Fill out the form and save. Woohoo! Your first macro is born, but it doesn’t do anything… yet.
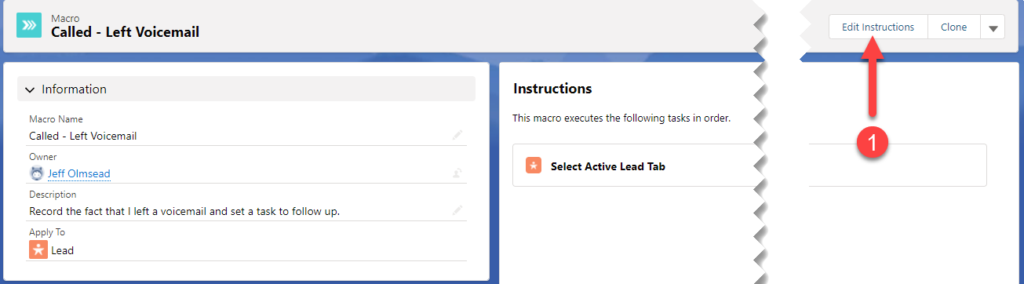
I Have a Macro, Now What?
The next screen is the only tricky part because it leaves you wondering “now what”. But you are a Salesforce super user, so be brave and click the “Edit Instructions” button:
Wow, it took you back to the Lead we started from. How exciting! Ok, not really that exciting, but look carefully, everything is outlined with dashes now. Let’s click on “Log a Call”:
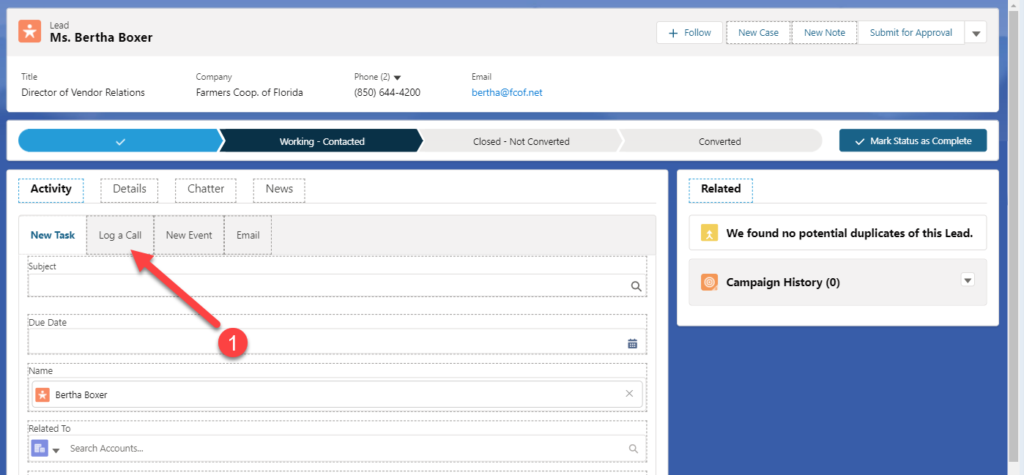
You will notice some activity on the right-side bar but let’s keep chugging. Click on “Comments”:
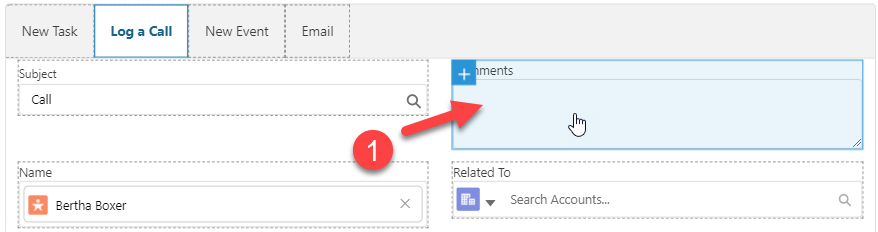
Over on the right-side bar you can see that an instruction was added to “Log a Call”. There is now a spot for you to enter in the “Comments” you want recorded:
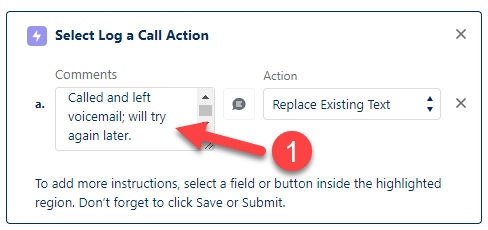
Don’t forget to Save! Back on the Leads screen click “Save”:

Now of course, if you wanted your macro to stop BEFORE saving (say you wanted to add your own notes), you could have stopped there, but we want to be super users so, let’s automate it all!
Macro a Task
So, how do you think I was able to get this next instruction added?
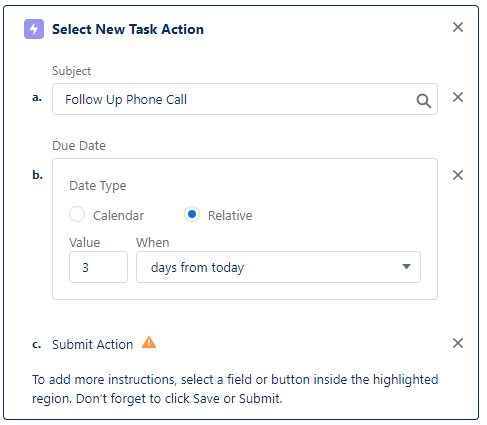
Yup, I just clicked on “New Task” on my Leads form and filled it out. BAM! I now have a task (reminder) that will notify me in 3 days that I need to make a follow-up phone call.
Macro an Email
Could we have a macro automatically send out the email as well? I’m glad you asked. The answer is yes. Here are the instructions for that:
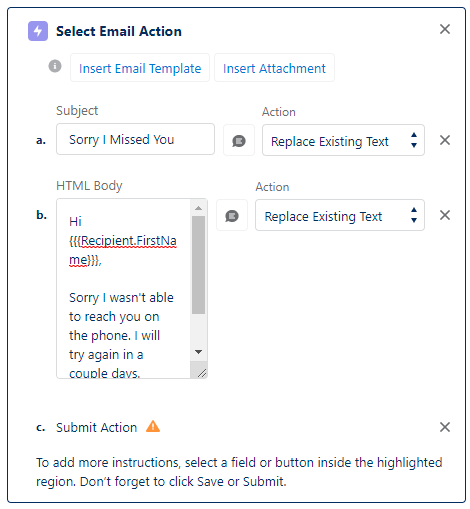
To pull that off I just clicked “Email” on my Leads form and filled it out. DOUBLE BAM!
You very attentive readers may have noticed I’m doing some magic by inserting the {{{Recipient.FirstName}}} merge field so it fills in with the person’s name when the email is sent. You can do that too! Prepare your template in regular mode and use the “Insert Merge Field” icon:
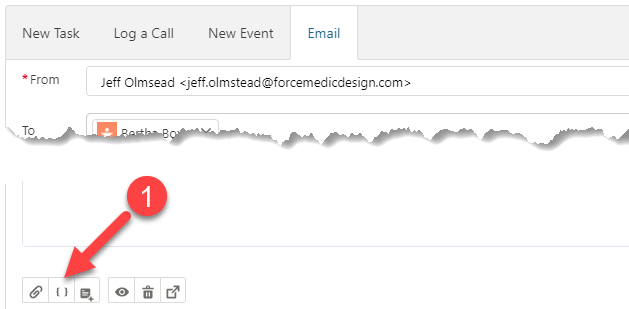
This will show you all the merge fields you have available and you can copy and save it over to your Macro (or if you are really cool you will use the Quick Text feature, but that is a future article).
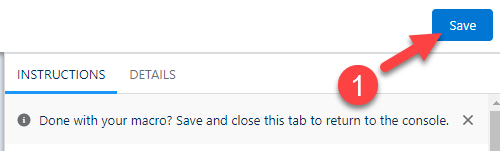
Don’t be Slow, Save the Macro
That is it; the three steps we wanted to accomplish for this Macro. Be sure and hit “Save” in the upper right-hand corner:
Go Macro Go
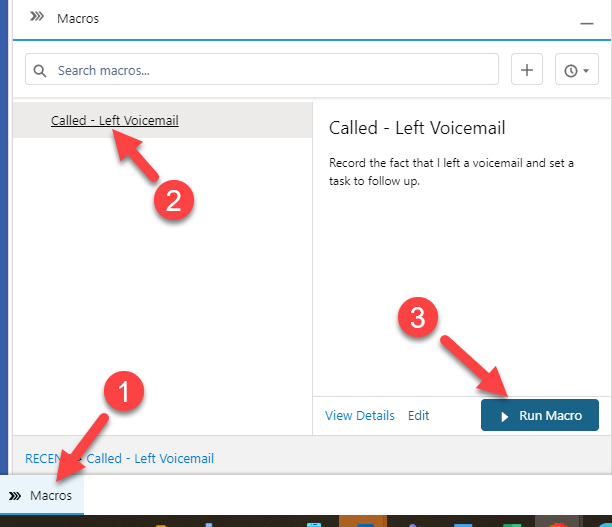
Now to put that macro to work! Head back to your Lead record (one that you don’t mind sending an email to), click on “Macros”, then click your newly created macro, and click “Run Macro”:
Holy Macro, It Works!
Right in front of your eyes you will see the Macro work and, if all goes well, green checkmarks everywhere.
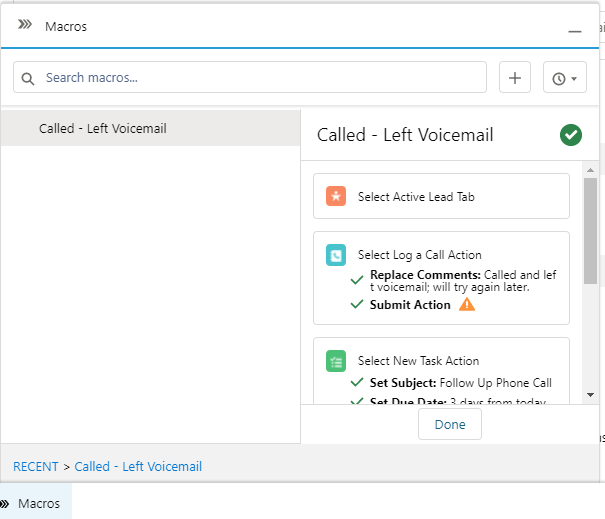
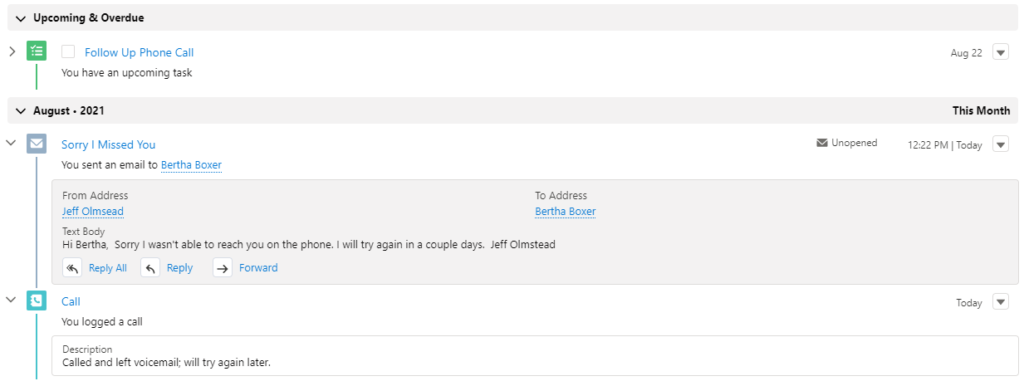
Your “Activity” tab shows that you logged a call, created a follow up task, and dropped an email, with one click.
Congratulations on being a super user! Create a macro in Salesforce for each of your most frequently repeated tasks. It will help save loads of time and become even more efficient as you manage records. You can probably think of more tasks you’d like to automate with macros. We’ll continue to showcase some of the most useful macros in future articles but, until then, keep rocking!