Do you find yourself repeatedly typing out the same text in Salesforce? Then you might consider using the Salesforce Quick Text feature to save all that time and tedium! Quick Text are small, pre-written snippets of text you can drop into emails, events, call logs, etc. In addition, the variables resolve when you use a Quick Text so you can edit and tweak things easier.
Keep reading to learn how to set up a Salesforce Quick Text and see an example of Quick Text being used to help populate an email.
Creating a Salesforce Quick Text
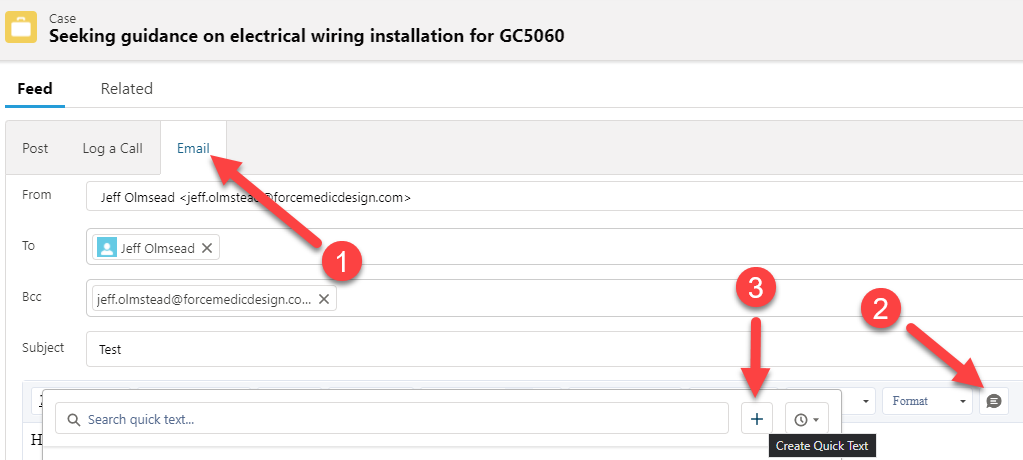
When you open a case, you make it a practice to notify the contact that you are “working on it” right? Yeah, you could ask the Salesforce Administrator to put some type of flow in place, but you like the ability to be in control and customize the notification a bit if needed. So, today is the day to get some Quick Text in play. The easiest way to get started with Quick Text is to begin where Quick Text can be inserted. In this instance, that’s a “Case” record:
When you click on the “Quick Text” icon (number 2 above) you can hit the “+” icon to create a new Quick Text. It is easy to start, just fill out the form:
Adding Variables
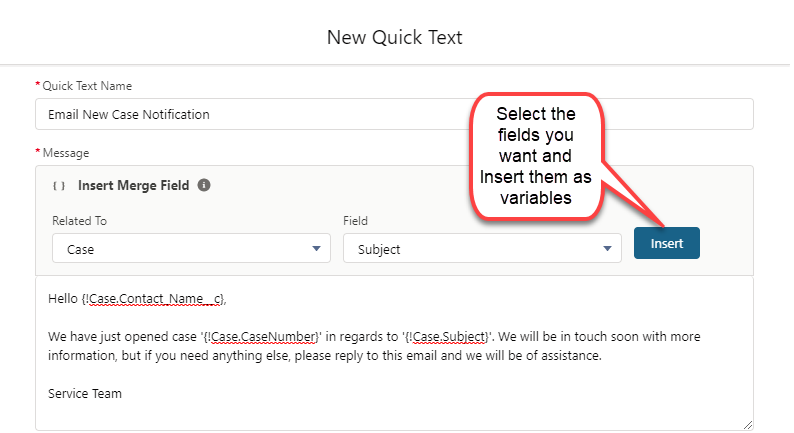
You can inject variables into your Quick Text as well, just be sure to keep everything related to the same object type (i.e. “Case” in this example). Note that the field must exist on the object to be able to use it.
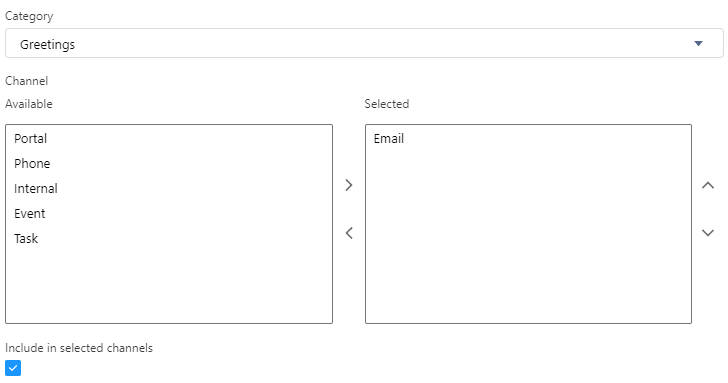
There are other options below, especially “Channel”, that let you select where you want this Quick Text to be allowed:
By default, it has selected “Email” since that is where I started from. If you have a generic “Quick Text” you might allow it in many places. Once done, click on “Save”.
Consuming Quick Text, One Bite at a Time
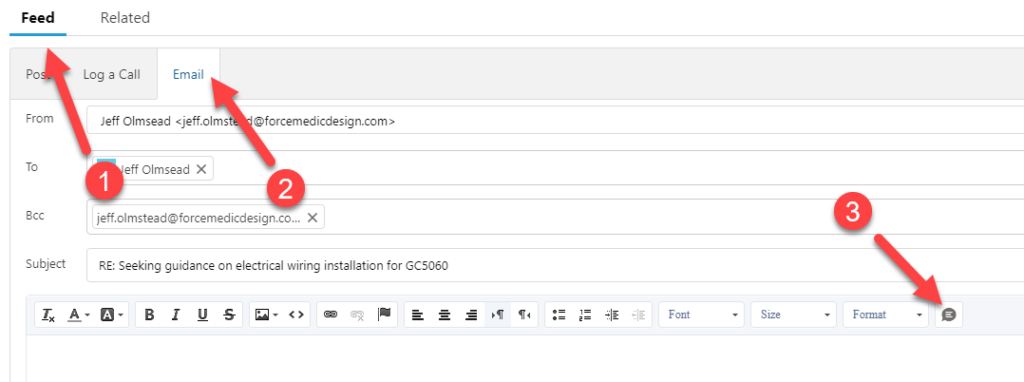
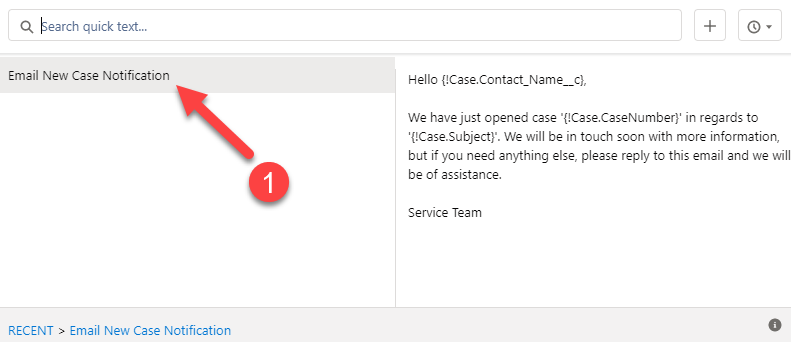
To consume your Quick Text, you start out on a field that supports quick text (such as a Case email):
Then, you just pick the Quick Text you want from the list:
Inserting the quick text immediately resolves the variables. You will see:
Handy, right?
Is there More?
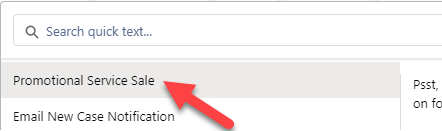
Don’t be confused though, you do NOT need to use it for the full body. Or, put differently, you can add even more via Quick Text. I hprepared a simple paragraph Quick Text for a promotion that I want to inject into the above email before it is sent. So, just put the cursor where you want it and choose your Quick Text:
And you will now have your final email! You can now do some light editing and send it off to the contact:
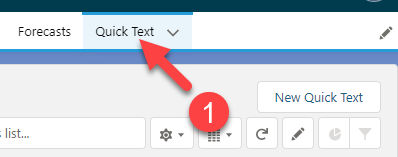
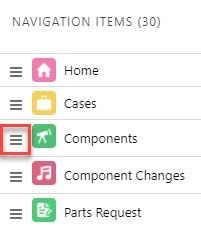
If you ever want to see / edit all your Quick Text, you can add it to your navigation:
Until next time, may the (Sales)Force be with you!
Recently, our team shared how to use Split View on lists. As cool as it is to have a Split View in place, however, what if you have way too much data that isn’t really relevant to what you need right now? Wouldn’t it be even better to have a filter in a Salesforce list to break it down to what you want? Maybe have your own personalized list view? It would! And this article will show you how, step by step.
Setting up a Filter in a Salesforce List
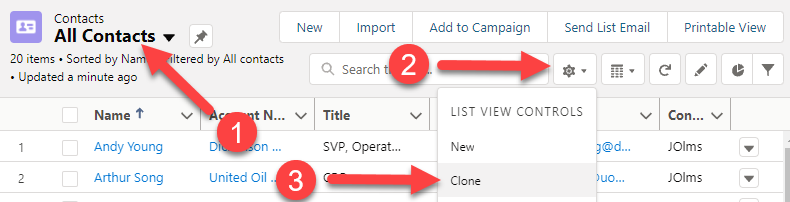
For our example today, let’s prepare a list of filtered contacts. The easiest way is to start with an existing list, in this case, “All Contacts”, and click on Settings, then Clone:
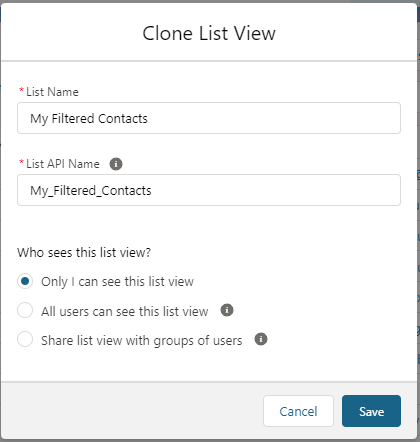
Fill in the popup form with a List Name and decide who can see this list view:
I have selected that “Only I can see this list view”. You might really want to share how awesome this list view is with everyone, but please don’t choose “All users can see this list view”. Not everyone will appreciate you cluttering up their list view options, and it will also make the list view available to Experience users (i.e. Community users). If you really want to share the love, use the last option, “Share list view with groups of users,” and pick all your favorite people.
Show Me the Filters
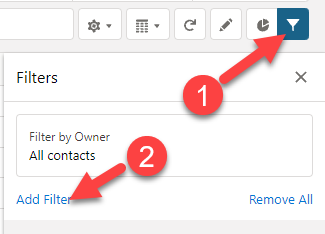
Ok, I know you are getting excited now. On the right sidebar you will see “Filters” (if not, just click the funnel-shaped icon). There is one existing filter there. You can edit it to filter down to contacts that you are the owner of if you like. Beyond that, to add a new filter (and I know this is tricky) just click on “Add Filter”.
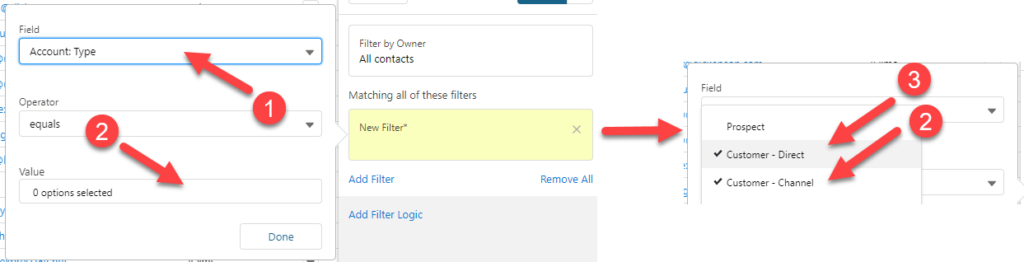
For this example list of contacts, I want to pull in those that are of the “Customer” types. I can simply click to select both of them:
I would also like to filter down to only contacts where the billing state is Arizona or California. Billing State is a text field, so we will need to add two filters to accomplish this: one for Account: Billing State/Province equals AZ, and one for Account: Billing State/Province equals CA. Right now this will NOT produce any results because, by default, it is looking for all these criteria and an Address State cannot be both AZ and CA at the same time. To adjust for this, we will have to “Add Filter Logic”:
Show me the Filter Logic
Take it easy, we’re getting there! When you click the “Add Filter Logic” link, as you see above, you will then see this:
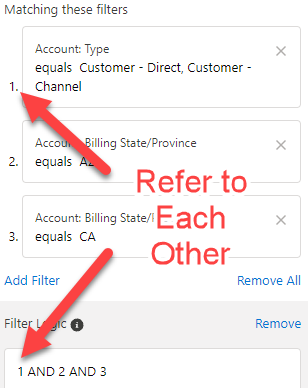
As shown above, the number 1 on the list view represents the same number 1 in the Filter Logic. In our case, we want 1 to always be true but 2 and 3 can be either or. To accomplish this we use the following Filter Logic:
1 AND (2 OR 3)
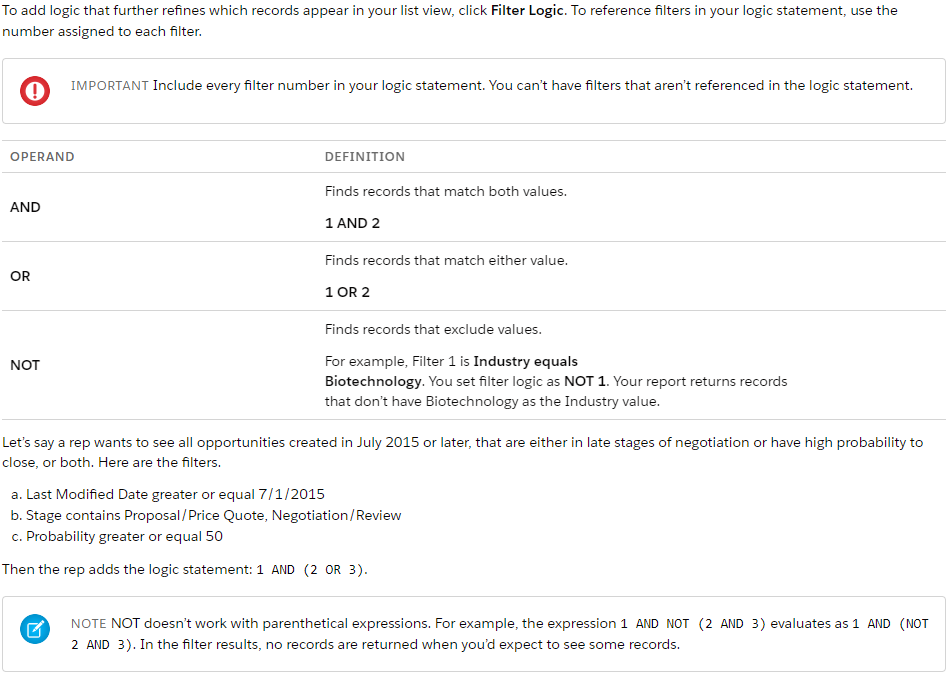
I can hear some of you already: “This is starting to feel a bit like coding!” But don’t worry, you’ll get a handle on it quickly. Salesforce has more information on it too. Here’s a screenshot:
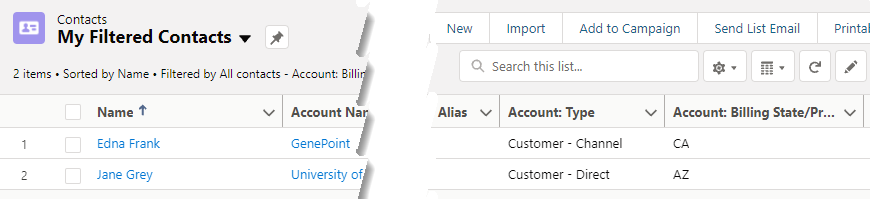
Once you have your Filter Logic as you want, click “Save” and see the results. I have exposed the relevant columns here so you can see the filters at work:
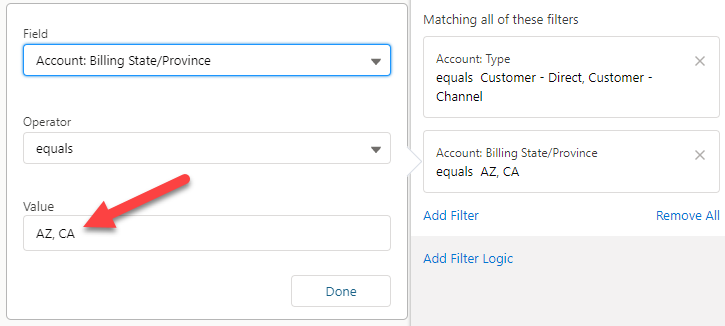
BONUS Filter in a Salesforce List
As a bonus, for the above example where I used Filter Logic, you could also use comma separated variables to accomplish the same thing:
Now that you can use split view AND customize a filter in a Salesforce list, you have a powerful one-two punch that will boost your efficiency and decrease frustrating clutter in your Salesforce views.
If you’ve found this helpful, the Forcemedic team would love to help you learn even more about using your CRM platform and building and customizing it to fit the needs of your organization. Give a shout with the contact button at the bottom of the page!
It’s happened to all of us: you get to the office, get your coffee, make a little small talk about what your coworker did last night, and then go to log in and get to work, absolutely sure that you’re using the correct Salesforce password. It doesn’t work, so you try it again. And again. Then you are locked out. Now you have to email your admin, maybe feeling embarrassed, frustrated, angry, or all three.
Here are a couple of tips that will lessen your desire to snap your keyboard in half.
Remember the Three Attempt Rule
Remember that you get three invalid login attempts before you’re locked out of Salesforce for an hour. There was a time when many more login attempts were allowed. Best practices have reduced attempts to three to provide a higher level of security. Personally, if I enter mine incorrectly twice, I click the “forgot password” link and reset it. Annoying, yes, but it beats being locked out for an hour if your admin happens to be busy.
Save Your Salesforce Password in a Password Vault
Use Lastpass! LastPass is an online password vault that’s easy to use. Simply remember one password to open your vault, and LastPass remembers the umpteen other passwords you have for websites, apps, portals, and platforms. It also periodically generates new, very secure passwords so you can stop using “I_heart_ForceMedic”.
You can even add the LastPass extension to your browser and access your vault directly from a login screen. Just click on the dot-and-cursor icon to the right to open LastPass in a new tab.
There is even a LastPass app for iPhone and Android! If you need to log in to something on your phone or iPad and don’t happen to have your trusty password sticky note with you, LastPass recognizes your face or fingerprint and logs you right in.
I was skeptical about using LastPass and avoided it for as long as I could. Now, I can’t even think of not having it. Plus, the time spent to get it up and running was far less than I had anticipated.
Believe me: LastPass is not paying me to write this. They just make an excellent product that helps me manage my Salesforce Password (and my other passwords) conveniently and securely. I agree that getting locked out of Salesforce is annoying and disruptive to work, but LastPass will help. And I doubt you’ll find anyone who uses it and doesn’t like it.
No More Lockouts!
We get it- stuff happens. Sometimes even the best of us forget a password or make a typo at login. But, with the failed attempt limit in mind and some help from a password vault, there’s no reason to ever get locked out of Salesforce again.
Would you like to customize your Salesforce Navigation bar to display just the tabs you actually use? Well, this blog post shows you step-by-step instructions on how to add, remove, and customize your tabs. Let’s go!
How to Customize Tabs in Salesforce.
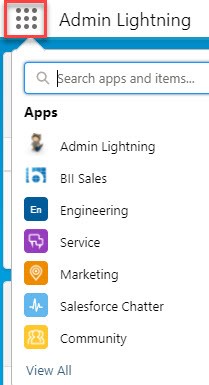
An “App” in Salesforce is a list of tabs that are used for a particular set of users, or a team. Each App can, and almost always will, have different tabs. You can view or change Apps (some users won’t have access to more than one App) by clicking the dots in the upper left corner:
To customize your list of tabs, click the pencil at the right side of the Navigation bar:
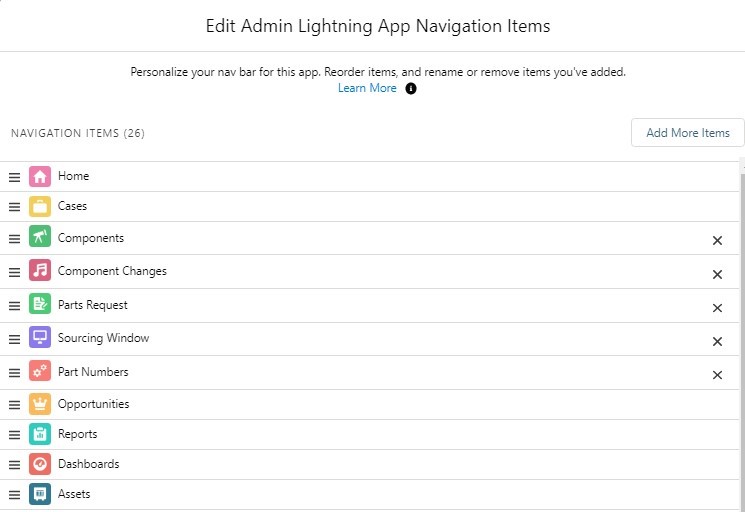
Once clicked, a screen showing your current tabs is displayed:
You can removed any tab with an “X” to the right of it from your Navigation bar. Tabs without an “X” are defaults for the App. Your administrator sets these. Ask nicely and they can remove them.
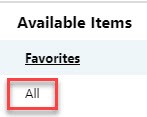
To add a new tab(s), click the “Add More Items” button and then the “All” option on the left:
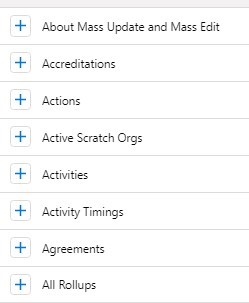
To choose one or more tabs you’d like to add, simply click the blue plus sign to the left of the label:
After saving your new settings, you can reorder tabs by clicking and dragging the 3 lines on the left to the desired location.
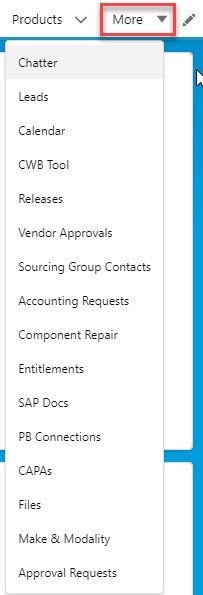
The new list and order of tabs show up after saving again. If there isn’t enough space to display all the tabs you’ve chosen, a “More” dropdown menu appears. The rest of your chosen tabs show when you click there.
There you have it! Use this tip to save time and increase productivity. It also reduces the frustration of scrolling through a long list of tabs you don’t actually use. If you’ve found this helpful and would like to get even more Salesforce support, reach out to us at ForceMedic Design!
The Salesforce list view is the way most of navigate in and out of records. While list views can be enhanced with filters, charts, sharing settings, and field specificity, their weakness is the need to navigate back and forth between a list view and a Salesforce record dozens of times a day. This constant clicking was a real productivity drain when executed over and over and over again. Then, split view came to town.
Salesforce Split View Defined
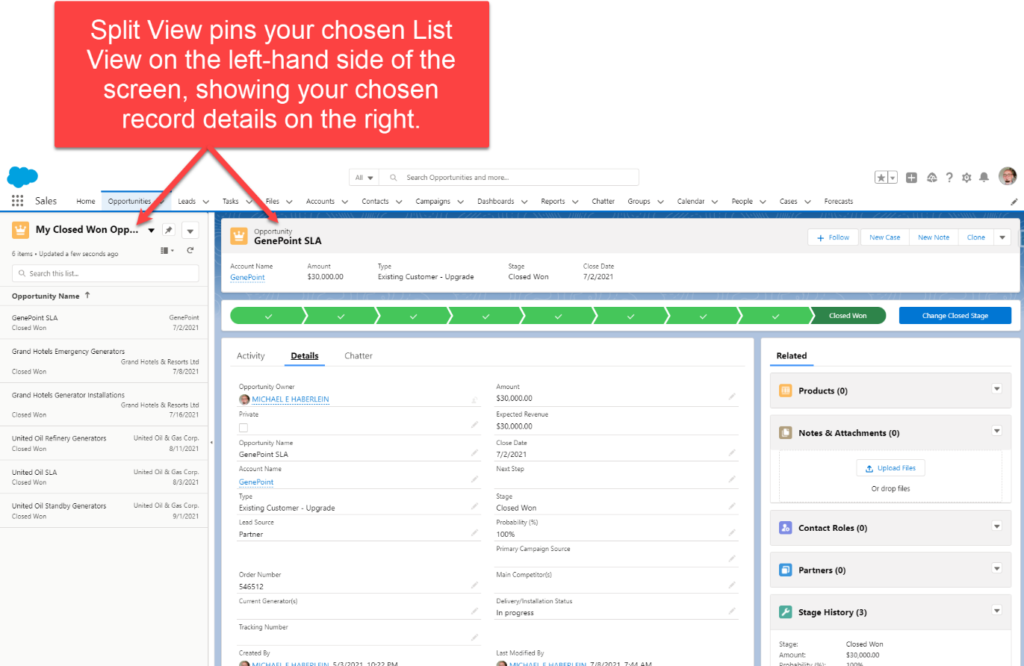
Split view is a type of list view available in Salesforce Lightning Experience that ‘pins’ your list view of choice to the left side of the screen, showing your chosen record’s details on the same screen. It is useful for navigating records in sequence rather than having to go back-and-forth to a list view and its records.
Access and Use
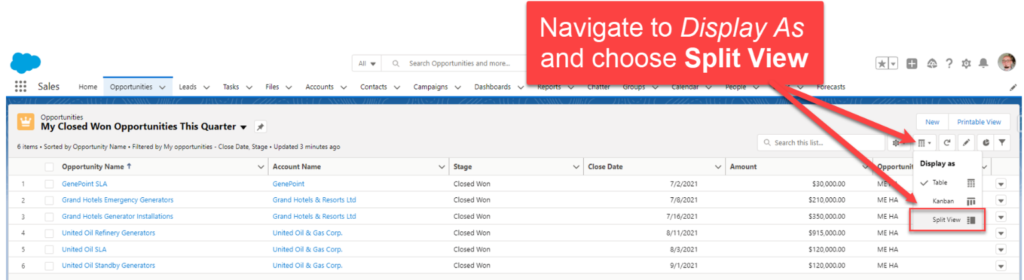
To modify any list view you are in from the tabular (i.e. “normal”) view, navigate to the “Display As” icon and choose the “Split View” option.
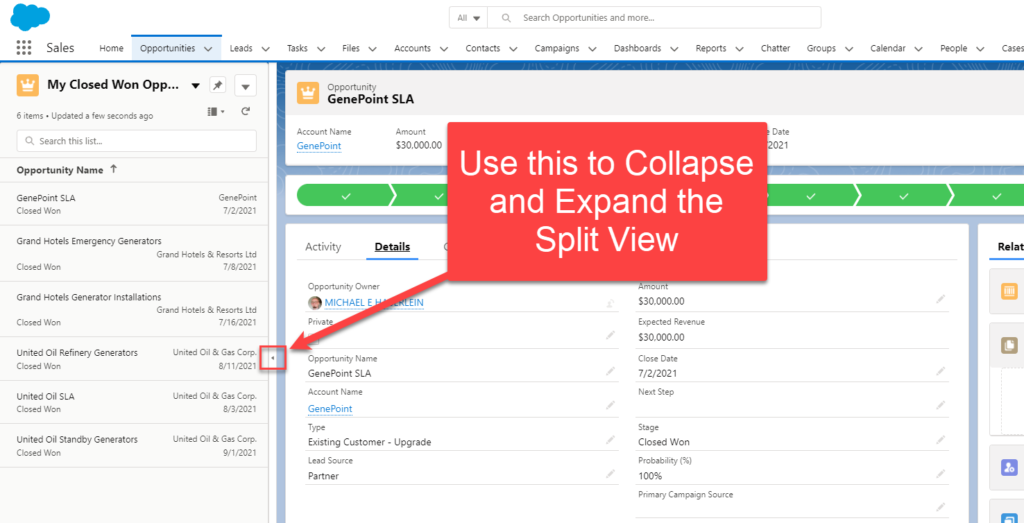
Once you have activated the list view, click on a record to view it on the same screen. If you find the new view takes up too much screen real state, you can use the arrow icon to collapse or expand.
Considerations
There are some considerations regarding split view that assist in understanding its nuances.
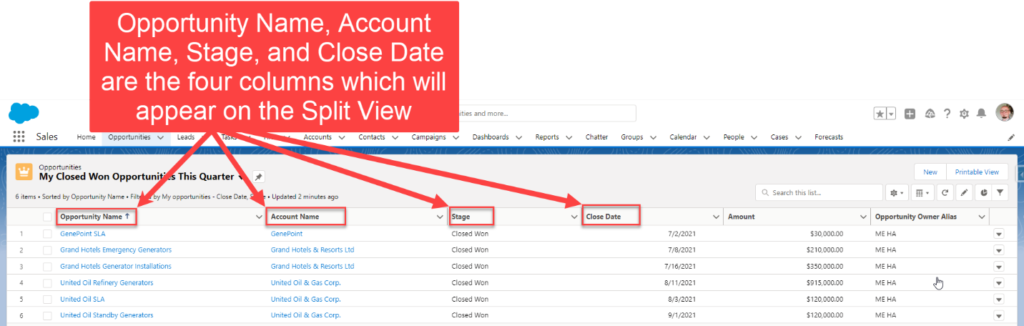
You’ll see the first four columns (fields) that you have on the list view from which it was created. In the example we are using, the My Closed Won Opportunities This Quarter list view has four columns that will display:
Opportunity Name
Account Name
Stage
Close Date
If the Salesforce App you are using is not configured for Lightning, it will not allow for split view in this circumstance. Look for an (i) icon in the upper right corner of your screen. If you see it, you’re not configured for Lightning.
You cannot filter fields from here. You need to return to the tabular view to do so.
Split View is PHAT
The ability to see my list of records and navigate to them on the same screen is a game changer. It was super annoying clicking back and forth between screens all the live-long day. Then split view came along and was all “Hey, I got you bruh.” I highly recommend giving this feature a whirl to take the next step in becoming a Salesforce Ninja!
The day you began using Salesforce, you already took a powerful tool for organization, speed, and efficiency into your hands. But there’s always room to go faster and to be more efficient, right? Of course! We’re going to highlight two features in Salesforce Chatter and records that will save you time and help keep you further away from carpal tunnel by saving you thousands of clicks and scrolls as you navigate your records.
Collapse a Section
Did you know that Salesforce pages have collapse sections? Crazy, right? Think of all time you’ll save when you don’t have to scroll past information you don’t need all the time. Take a look below to see how it’s done.
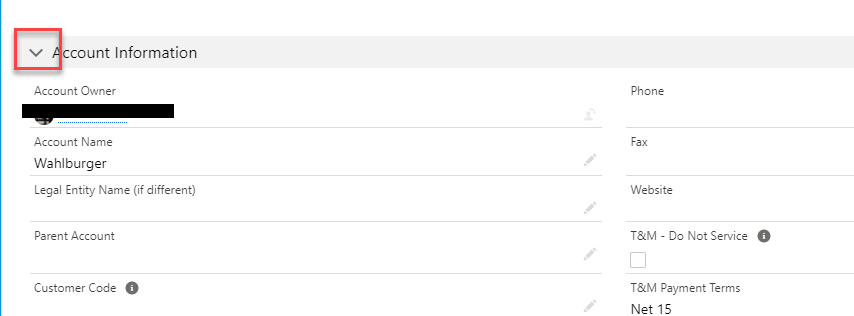
Take a look at an Account record, where it says account information. There will be a down-pointing arrow beside the menu heading.
If you click that down arrow, the section will collapse down to a single line. Keep in mind: Salesforce is smart and will remember what sections you have collapsed. If you see anything missing from your page the next time you sign in, looking for section labels with right-pointing arrows is a great place to start.
Filter and Search a Salesforce Chatter Feed
Salesforce also allows you to filter and search within your chatter feeds. When it comes to saving time, this feature is even better than collapsing sections. This is a straightforward feature that works in both Lightning and SF Classic.
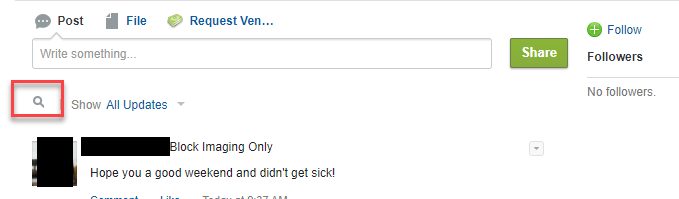
In Classic, under where you post to chatter, there is a magnifying glass icon.
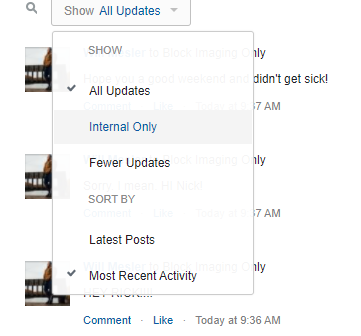
Click that icon and you can enter whatever search term you’re looking for. You can also filter your chatter by most recent post and latest activity.
Maybe you want to see the most recent post. Or you just remembered something So-and-So said at the beginning that has now become critical information. Save yourself the scrolling: Filter the chatter. Search the person who posted it.
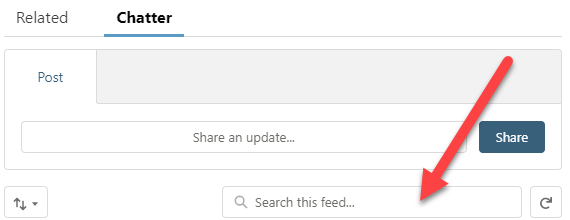
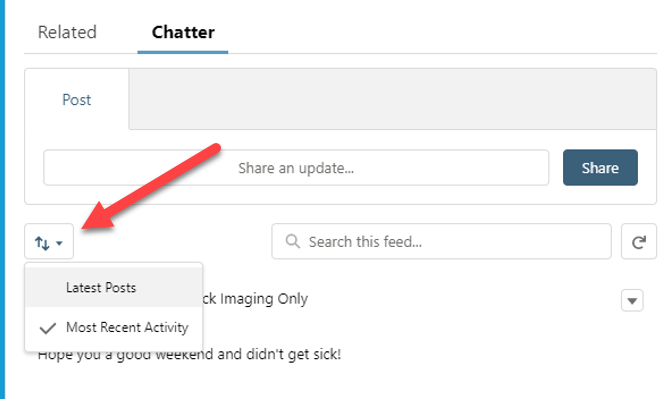
This is what searching and filtering looks like in Salesforce Lightning.
Start using these features today to save yourself some time and take these record pages into your own hands. You already know Salesforce is a powerful tool. Now you can make it a faster one too!
If you’d like to learn more about using platforms like Salesforce, integrating existing systems with Salesforce, or custom platform development, we’re here to help. Drop us a line any time!