The Salesforce navigation menu in Lightning Experience is much more than just a way to access pages. It’s loaded with shortcuts for creating records and jumping straight to specific pages from wherever you are. As a result, you’ll work faster and your manager will think you’re more awesome than you actually are. Or, perhaps you’re already that awesome and super-fast SF navigation will simply help them notice. In either case, we’ll take a closer look at two big time-saving shortcuts, right here.
Get Quicker in Salesforce Navigation Menu
Open in New Tab
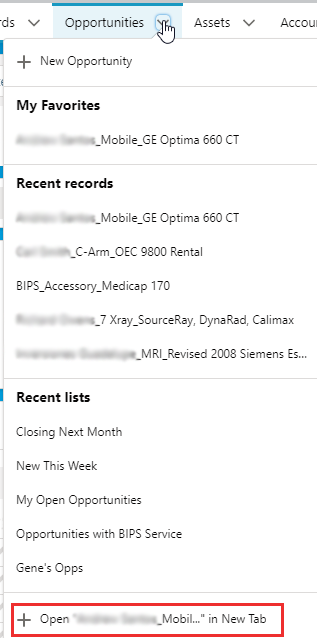
See the down arrow icon next to many of your items? Click it and a menu with a bunch of reallyhelpful items pops up.
This menu shows Favorites, Recent records, Recent lists, and Open “[active record or view]” in New Tab. Favorites, Recent records, and Recent lists are self-explanatory, but what about Open in New Tab? Well, if you’re on a record when you click the dropdown, that record is listed within the Open in New Tab menu item. If you’re on a list view, that list view is within the Open in New Tab menu item. A new, temporary tab appears in your navigation menu when you click that item. This new tab looks a little different than the others, with an asterisk and in italics.
Temporary tabs stay in your navigation bar until you close them, switch apps, or log out of Salesforce.
My Favorites
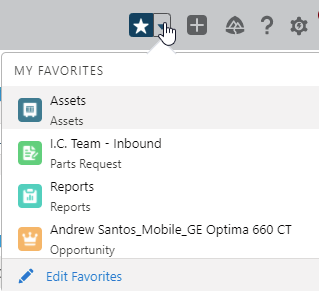
Another feature of the Salesforce navigation menu is Favorites, which lets you jump to specific records, lists, groups, and pages. Favorites are similar to bookmarks in a web browser. You can access them by clicking the favorites star at the top of the page. It’s there to help you quickly navigate to things you use often, regardless of the browser or computer you’re using. Adding the page you’re on to your favorites is as simple as clicking the star.
Saved favorites are always just a click away in your personal favorites list.
Look for the highlighted star to indicate you are on a favorite page. Remove a page from the favorites list by clicking the highlighted star.
Organize your favorites list to keep it effective as it grows. You can edit the list to arrange favorites in an order that makes more sense and rename favorites so they’re memorable. For example, give an opportunity a short nickname or change an ongoing case from a number to a descriptive label. Don’t worry, you’re not changing the actual name of the record!
Faster Salesforce Navigation Today
There you go: two shortcuts that eliminate tons of clicking and scrolling and make frequently-used items much easier to find. With these tools under your belt you’ll be blazing through Salesforce tasks and catching the manager’s eye in no time!
Salesforce debuts a comprehensive release of new features and apps three times per year (Winter, Spring, Summer). These bring all sorts of goodies to the platform. The Salesforce Winter 2022 release is here and there are several new features we’d like to put on your radar.
It’s part of our job at ForceMedic to review these new features and ensure they play nicely with our build. The following three play very well and we think you’ll love them too!
3 New Salesforce Features for 2022
Inline Editing of Report Data
The ability to update data through inline editing on reports has been in beta for 6 months. Now it’s finally being released for all Salesforce orgs, platform-wide. As a result, we can update reports more efficiently because we don’t lose our place clicking back and forth. On October 2nd, we can edit date, picklist, and lookup fields without leaving a report to find the record and update fields from there. This could save hours in productivity.
Email Template Builder Updates
Salesforce made a lot of updates to the Email Template Builder over the last several releases. Several more are coming in the Winter 2022 release. These offer more options in creating and using custom email templates.
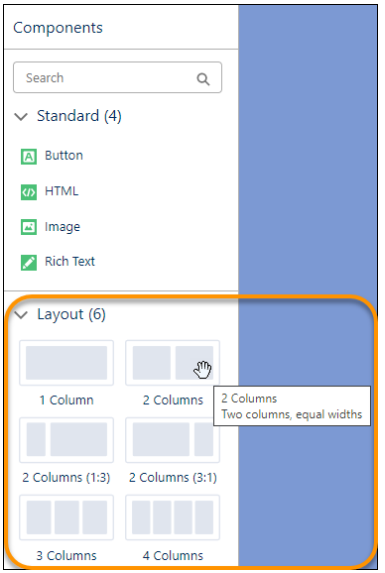
Add Rows and Columns to Your Email Templates
Use the Layout component to easily add a row to your Email Template Builder or Email Content Builder template. Select a layout with no columns or a set of up to four.
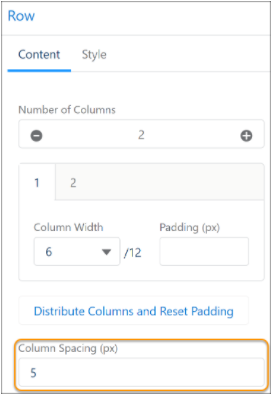
Add Column Padding
Padding between columns in Email Template Builder gives them definition. Before, you could pad content in an individual column. Now, you can evenly pad space between all columns.
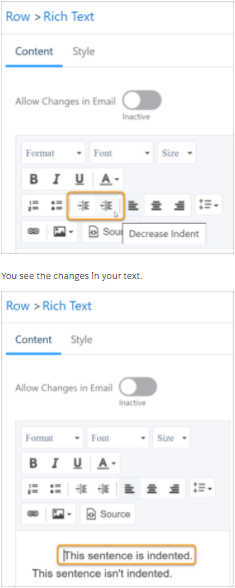
Add Indentations to Emails Templates
Indenting creates visual variety and organizes text in your templates. Varying indents emphasize text and make it easier for email recipients to notice it.
Create Longer Subject Lines
The Subject field in Lightning email templates and email templates from Email Template Builder can now be up to 1,000 characters, up from 230 characters. As a result, you can engage readers with more descriptive or eye-catching subject lines.
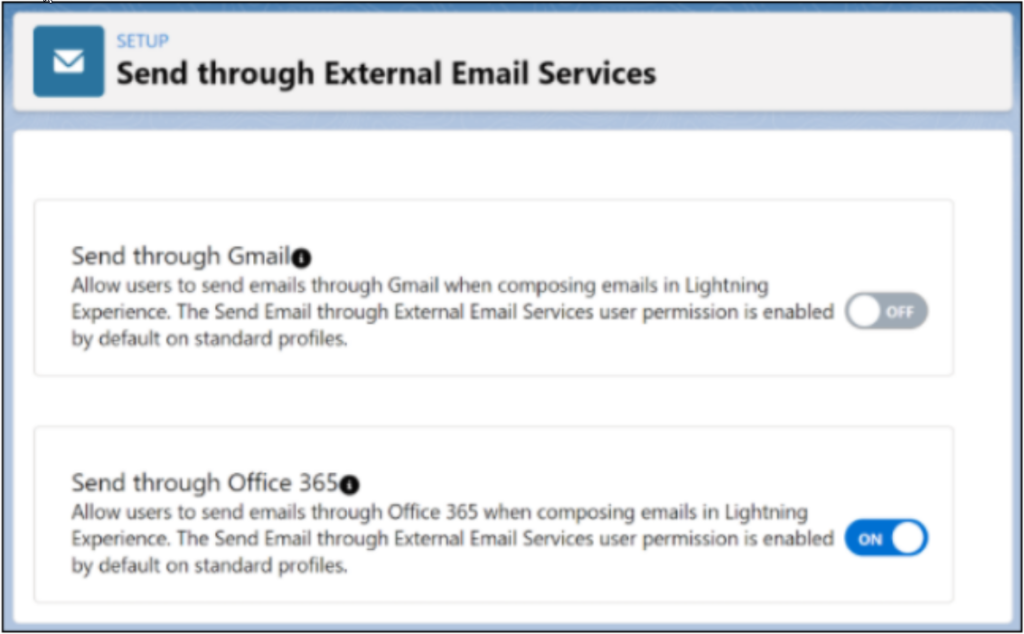
Send List Emails via Your Email Provider (BETA)
List emails let us run marketing campaigns from Salesforce to as many Contact or Lead records as we want (up to 5,000 emails per day). These emails were once sent using only Salesforce, and the system was notorious for formatting issues, bounces, and spam flags.
Because of these issues, Salesforce is running a pilot program that sends list emails through Outlook. Now, the Lightning for Outlook app links these email campaigns to our Lead/Contact records. This give a 360-degree view of communications we have engaged with those records on.
Excited for the Salesforce Winter 2022 Release?
The team at ForceMedic is always excited about a new Salesforce release, but we hope we’ve built some excitement on your end too. If you’d like to learn more about working these, or any other, features into the way you use Salesforce, we’d love to help! Please contact ForceMedic Design to learn more.
Ever have those moments in Salesforce where you find yourself doing something you did 5 minutes ago? Open new record, click, type, save, repeat… yawn. If only there was a way to automate it! Sure, those administrators could take care of this for you, but you hate to interrupt them when you know they’re busy building their kingdom in Minecraft. Besides, you’re a Salesforce super user. You’ve got this! You can solve this problem when you create a macro in Salesforce.
Hello Macro: Automating Manual Processes
It is time to kick it up a notch and automate those repetitive tasks. If a task is one you do on-screen, a macro may be a good fit for you. While you can’t automate actions in list views (yet) you can automate most record details.
WARNING:The content you are about to read may leave you excited and passionate. Please use caution when expressing your enthusiasm.
Today we will use the classic example of working a Lead to introduce you to macros. Head over to your Salesforce instance, navigate to a Lead record, and get ready to begin!
In this example we are trying to automate the process of:
1. Logging a call was made into a Lead
2. Scheduling a follow-up task to call the Lead back in 3 days
3. Sending an email to the Lead letting them know we tried to reach them
Creating Your First Macro
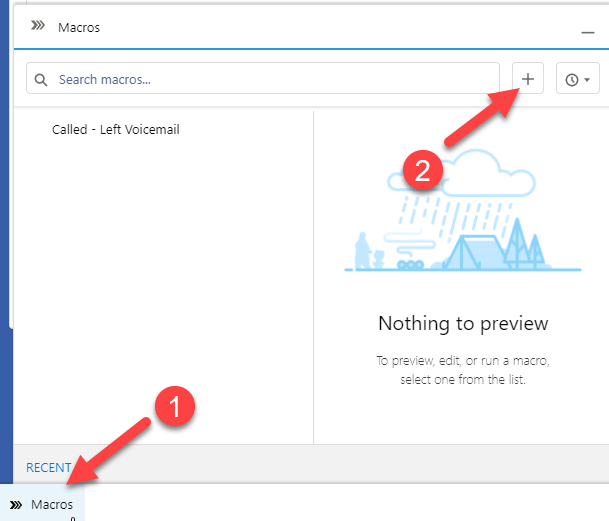
The Utility Items (i.e. the bottom navigation bar) in Salesforce is where you will find your “Macros” link. Click on it, then press the “+” icon to fire up a new macro.
If you don’t see a “Macros” link it is because the Admin didn’t add it to your app. Unfortunately, you’ll have to submit a request to have it added and start making macros later.
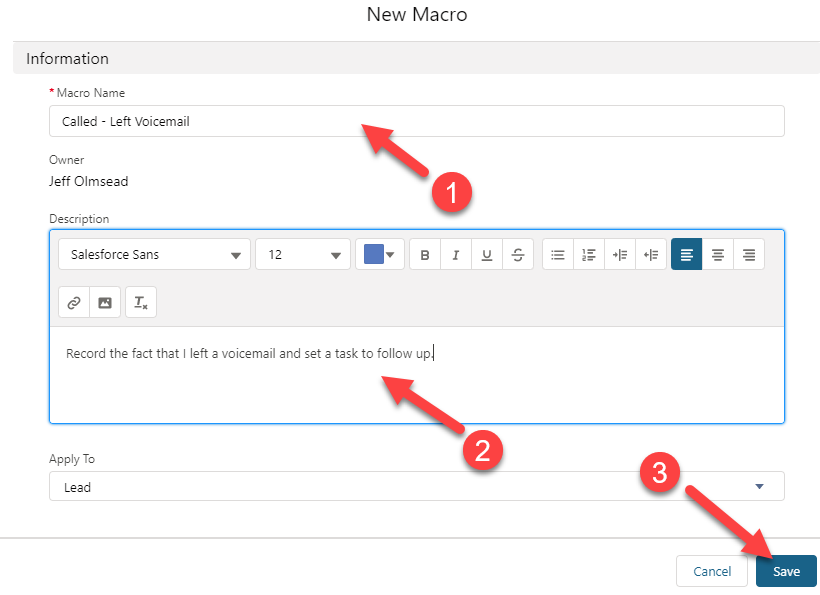
If you were able to find your “Macros” link, sweet! We’re getting there. Fill out the form and save. Woohoo! Your first macro is born, but it doesn’t do anything… yet.
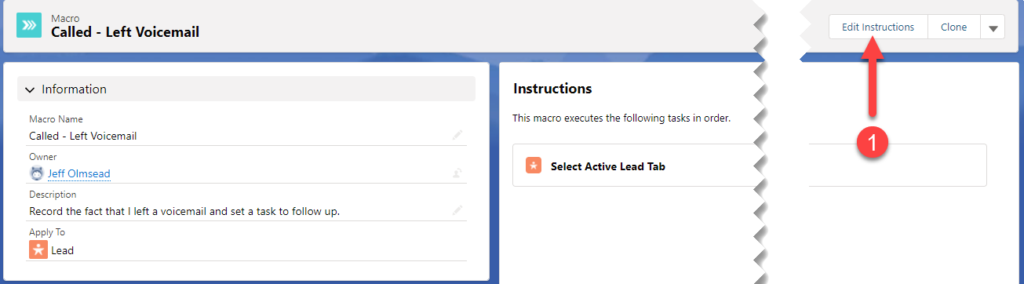
I Have a Macro, Now What?
The next screen is the only tricky part because it leaves you wondering “now what”. But you are a Salesforce super user, so be brave and click the “Edit Instructions” button:
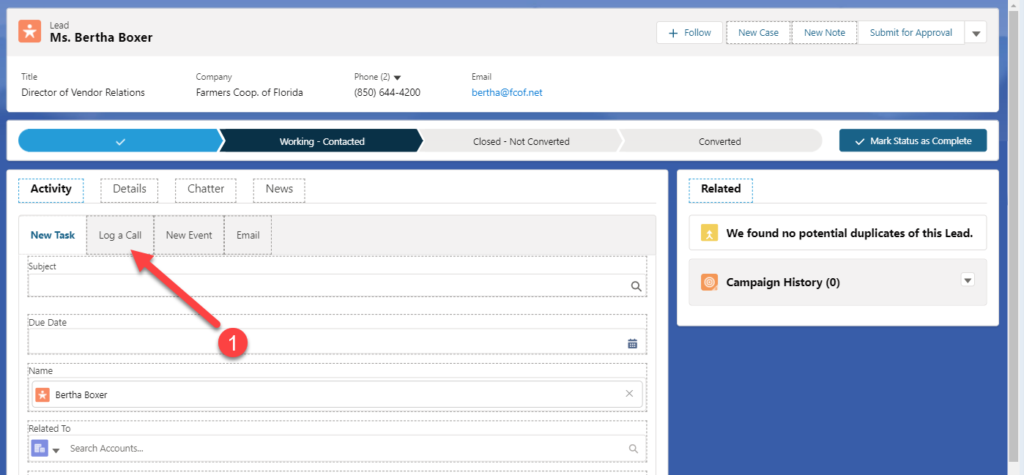
Wow, it took you back to the Lead we started from. How exciting! Ok, not really that exciting, but look carefully, everything is outlined with dashes now. Let’s click on “Log a Call”:
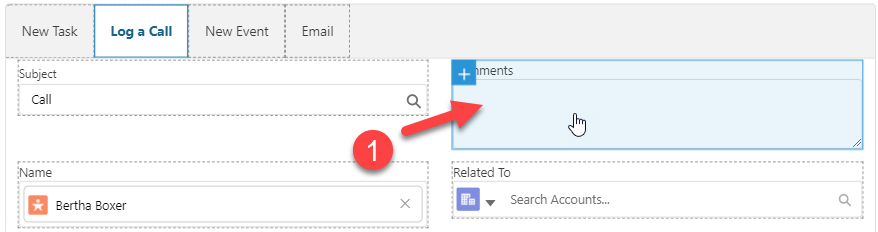
You will notice some activity on the right-side bar but let’s keep chugging. Click on “Comments”:
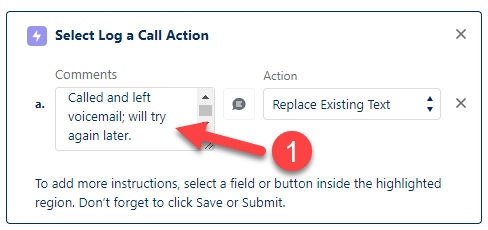
Over on the right-side bar you can see that an instruction was added to “Log a Call”. There is now a spot for you to enter in the “Comments” you want recorded:
Don’t forget to Save! Back on the Leads screen click “Save”:
Now of course, if you wanted your macro to stop BEFORE saving (say you wanted to add your own notes), you could have stopped there, but we want to be super users so, let’s automate it all!
Macro a Task
So, how do you think I was able to get this next instruction added?
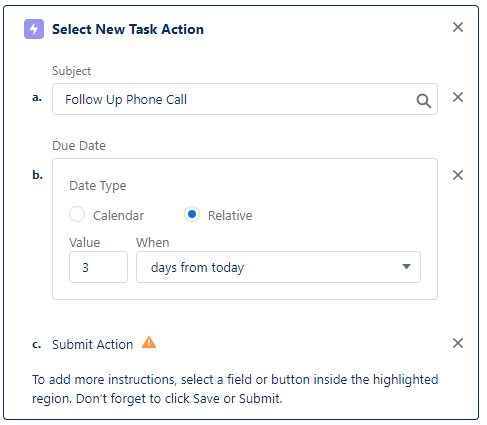
Yup, I just clicked on “New Task” on my Leads form and filled it out. BAM! I now have a task (reminder) that will notify me in 3 days that I need to make a follow-up phone call.
Macro an Email
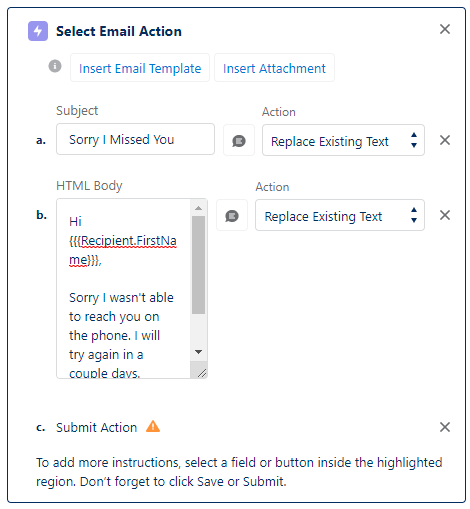
Could we have a macro automatically send out the email as well? I’m glad you asked. The answer is yes. Here are the instructions for that:
To pull that off I just clicked “Email” on my Leads form and filled it out. DOUBLE BAM!
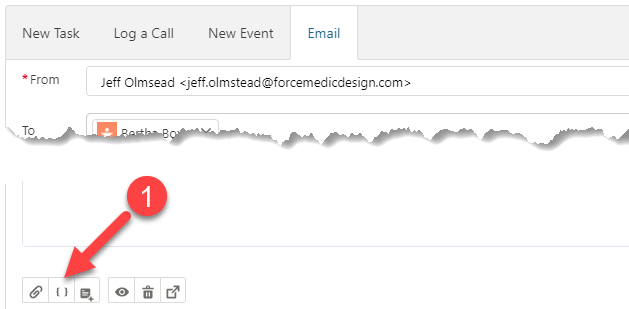
You very attentive readers may have noticed I’m doing some magic by inserting the {{{Recipient.FirstName}}} merge field so it fills in with the person’s name when the email is sent. You can do that too! Prepare your template in regular mode and use the “Insert Merge Field” icon:
This will show you all the merge fields you have available and you can copy and save it over to your Macro (or if you are really cool you will use the Quick Text feature, but that is a future article).
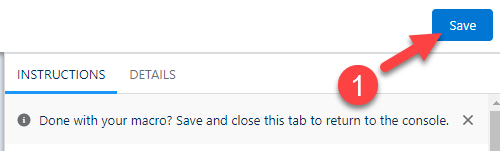
Don’t be Slow, Save the Macro
That is it; the three steps we wanted to accomplish for this Macro. Be sure and hit “Save” in the upper right-hand corner:
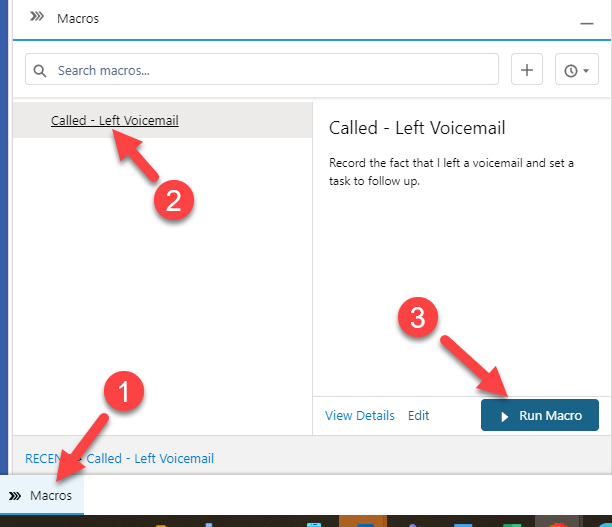
Go Macro Go
Now to put that macro to work! Head back to your Lead record (one that you don’t mind sending an email to), click on “Macros”, then click your newly created macro, and click “Run Macro”:
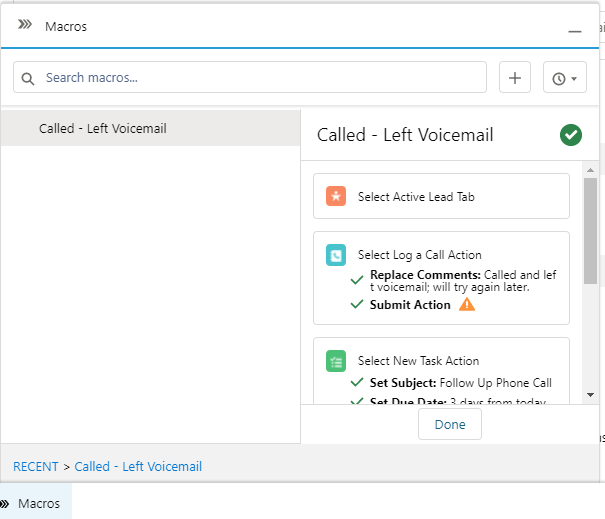
Holy Macro, It Works!
Right in front of your eyes you will see the Macro work and, if all goes well, green checkmarks everywhere.
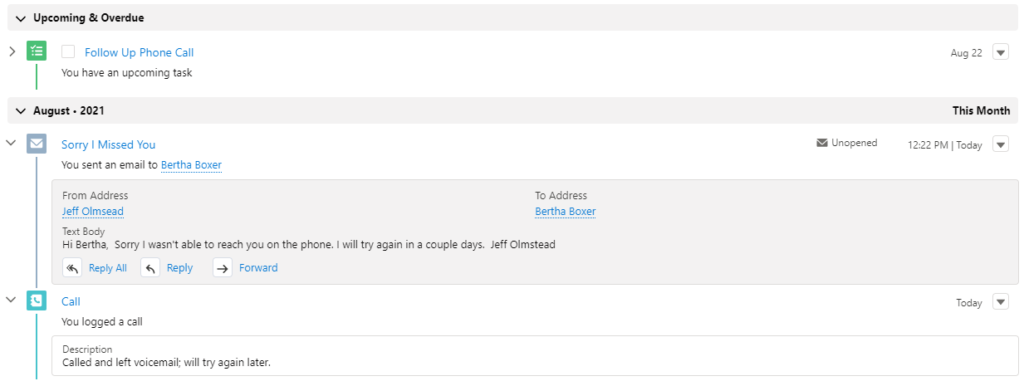
Your “Activity” tab shows that you logged a call, created a follow up task, and dropped an email, with one click.
Congratulations on being a super user! Create a macro in Salesforce for each of your most frequently repeated tasks. It will help save loads of time and become even more efficient as you manage records. You can probably think of more tasks you’d like to automate with macros. We’ll continue to showcase some of the most useful macros in future articles but, until then, keep rocking!
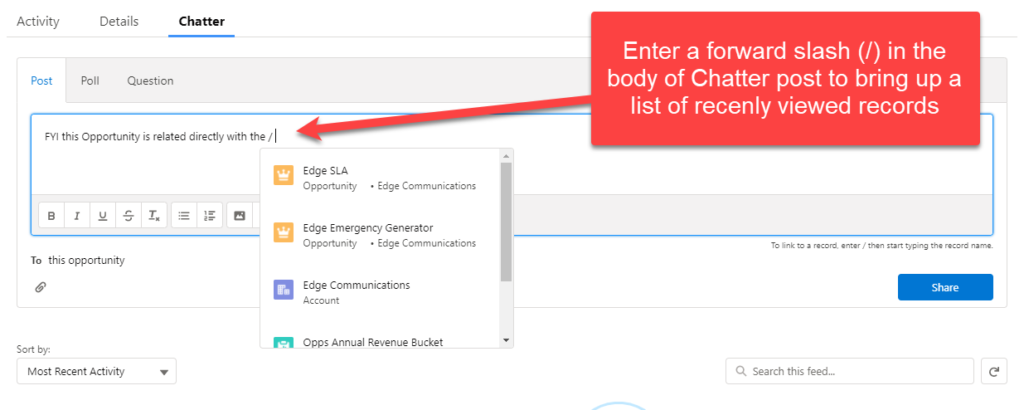
Did you know that in Salesforce Lightning, you can directly reference recently accessed Salesforce records in Chatter by using the forward slash ( / )? The ability to directly tag records in Salesforce Chatter is an important tool for streamlining communications and increasing sales team synergy. Directions on how to do this are below.
1. Enter a forward slash (/) in the body of a Chatter post.
Entering a forward slash into your Chatter post tells Salesforce where you want to insert your link.
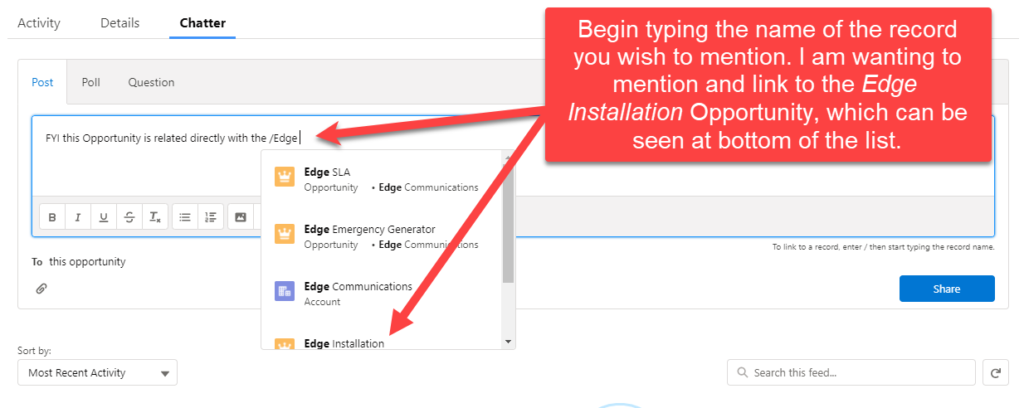
2. Start entering the record name.
Begin typing the name of the record you want to link and Salesforce will begin populating a list of recently viewed records with names that contain those words.
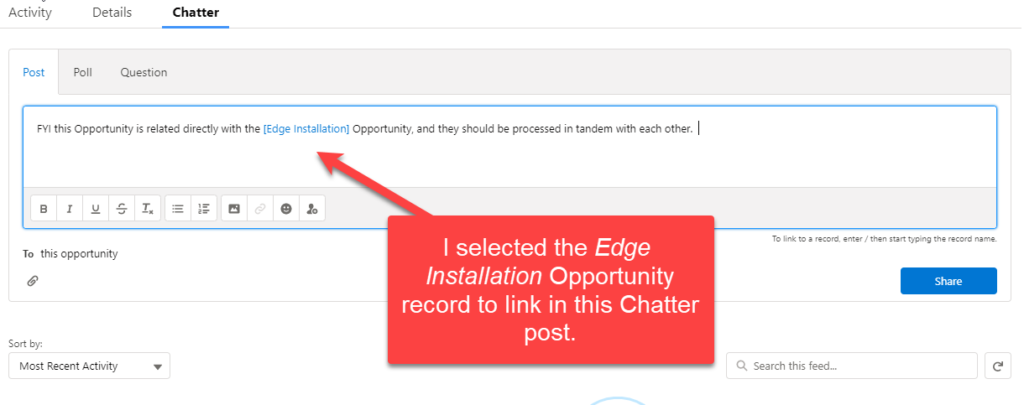
3. Select a record from the list.
IMPORTANT: Records on the list are returned as the result of a search, and the search returns only the records that you’ve looked at recently. So, if you’ve never viewed or interacted with a particular record, or if it’s been a very long time since you have, it will not appear on the list.
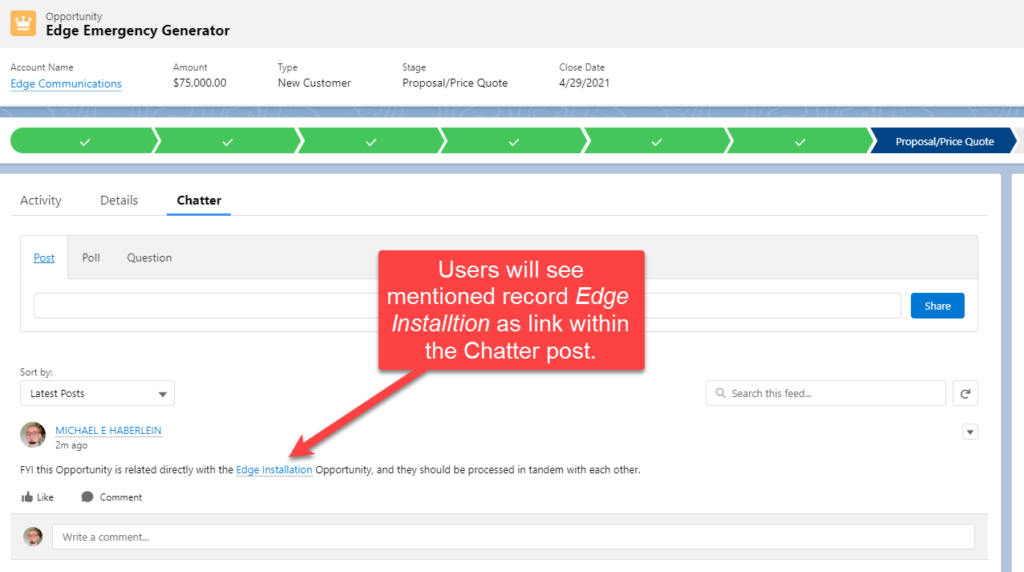
4. Finish writing your post or comment and click Share.
The users who can access the record can also see the record name as a link within the Chatter post. The users who can’t access the record, due to their assigned role or permissions-based limitations, will see a Record Not Available message instead of a link to the record.
Using these direct links to tag records in Salesforce Chatter will make your team’s communication clearer, cleaner, and faster! If you would like to know more about this or any other Salesforce functionality, bookmark this page for more tips (weekly) on using Salesforce more efficiently and effectively. If you’d like to dive even deeper and explore system integrations or custom tools, please contact ForceMedic Design, where we love talking platform development.
Creating list views in Salesforce is one of the most helpful skills a user can have. A list view is an underused tool that lets you see particular segments of your data quickly. People often confuse list views with Salesforce reports but, instead of spending the time to build an entire report when you really only need to sort by one field, why not create a list view?
Here are some examples of when to use list views:
You need a list of contacts in Minnesota, Wisconsin, and Illinois who are interested in a specific product
You want a list of all your won opportunities from this quarter
You need a list of all open cases that are over one week old
If you want a quicker way to sort your data, let’s jump right in and get you building your own list views. Follow along with the video below for step-by-step instructions. Happy listing!
Ever add a new option to your Salesforce picklist, navigate to a record, and don’t see the value you just added when you click edit? Being the awesome admin that you are, you of course clear the cache and excitedly await the page reload… but nothing, still the Salesforce picklist values are missing. Now what?
Locating the Missing Picklist Value in Salesforce
No, you don’t need to be a sleuth – this case will be resolved shortly. The thing to remember is Salesforce picklist values are controlled by Record Type. It is a beautiful thing really, this is what allows you to have the same field present different picklist values based on the record type.
Adding the Salesforce Missing Picklist Value
Let’s use an example of an Asset record type to clear this up. To resolve this, navigate to:
Setup –> Object Manager –> Assets –> Record Types
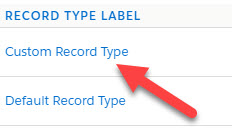
Then, pick the record type where you want the picklist values to appear and click on the record type label:
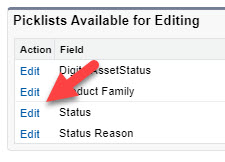
Then pick the “Picklist” you want to manage (in this case, “System Type”) and click “Edit”:
From there you can “Add” or “Remove” the values you want available for this record type:
Once done, just hit “Save”. Repeat this for every Record Type you want to manage the picklist options on.
Salesforce Missing Picklist Value Resolved
There you have it, you are back to being an awesome admin! You now have one more trick up your sleeves when you are missing a Salesforce picklist value.